- English
- Español
- Português
- русский
- Français
- 日本語
- Deutsch
- tiếng Việt
- Italiano
- Nederlands
- ภาษาไทย
- Polski
- 한국어
- Svenska
- magyar
- Malay
- বাংলা ভাষার
- Dansk
- Suomi
- हिन्दी
- Pilipino
- Türkçe
- Gaeilge
- العربية
- Indonesia
- Norsk
- تمل
- český
- ελληνικά
- український
- Javanese
- فارسی
- தமிழ்
- తెలుగు
- नेपाली
- Burmese
- български
- ລາວ
- Latine
- Қазақша
- Euskal
- Azərbaycan
- Slovenský jazyk
- Македонски
- Lietuvos
- Eesti Keel
- Română
- Slovenski

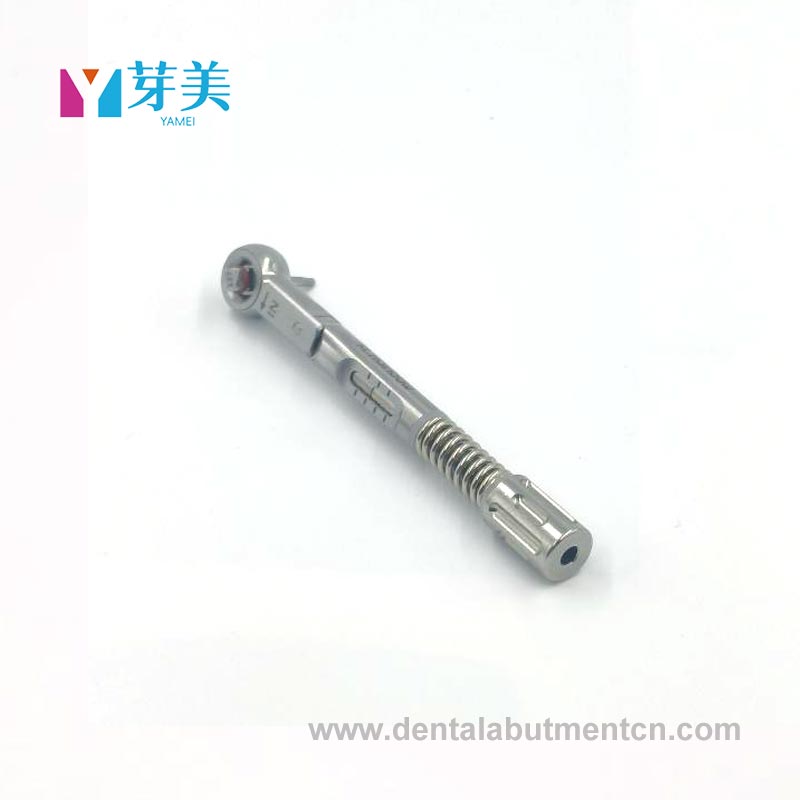
How to use Hex Driver?
Hex Driver as a core precision tool in implant surgery, whether it is used correctly will affect the surgical accuracy and the stability of the implant.
Preoperative preparation: Specification matching and disinfection treatment
Before starting the surgery, an appropriate Hex Driver should be selected based on the brand, model of the implant and the stage of the surgery. Hex drivers of different specifications correspond to implant grooves of different sizes. For example, narrow-diameter implants are usually paired with Hex heads with a diameter of 2.4mm, while wide-diameter implants may require a 3.0mm specification. When making a selection, carefully check the tool scale and the implant instruction manual to ensure that the hexagonal head matches the groove perfectly to avoid the implant slipping or getting damaged due to specification deviations.
After the specification selection is completed, the Hex Driver needs to be strictly disinfected. Place the entire tool into a high-temperature and high-pressure sterilizer and disinfect it according to the standard procedure of 134℃, 2bar pressure and 30 minutes to ensure the elimination of residual bacteria and meet the sterility requirements of the surgery. After disinfection, the tools should be allowed to cool to room temperature to avoid affecting the operation feel or the stability of the implant due to excessively high temperatures.
Intraoperative operation: Precise grip and torque control
When in use during the operation, first hold the ergonomic handle of the Hex Driver with sterile gloves. The grip posture should naturally conform to the arc of the palm - the thumb and index finger lightly touch the middle section of the handle, and the other fingers wrap around the grip. This not only ensures the stability of the operation but also reduces hand sliding through the anti-slip texture of the handle, lowering the fatigue caused by long-term operation.
Align the hexagonal head of the Hex Driver with the groove at the top of the implant and gently push it in until it is fully fitted. At this point, it is necessary to keep the tool in line with the axis of the implant and avoid applying force at an Angle. When implanting or removing the implant, apply the axial torque slowly. Use the hexagonal structure precisely processed by the tool to transfer the stable force, ensuring that the torque value at each step of the operation complies with the requirements of the implant manual. If the resistance suddenly increases, the operation should be paused and the bonding status checked to avoid forcing force that may cause damage to the tool or implant.
| Specification and model (Hex head diameter) | Examples of compatible implant brands/models | Applicable to the surgical stage |
| 2.4mm | Straumann BLX、NobelActive | Initial implant placement and abutment connection |
| 3.0mm | Camlog、BioHorizons Tapered | Wide-diameter implant placement and restoration installation |
| 3.5mm | Zimmer Screw-Vent、Dentsply | Special model implant adjustment |
Postoperative maintenance: Clean storage and extended lifespan
After the operation, it is necessary to clean and maintain the Hex Driver in a timely manner. First, rinse the surface of the tool with sterile distilled water to remove blood and tissue debris. Then, gently brush the crevices of the hexagonal heads with a soft-bristled brush to avoid residual dirt affecting the next use. After cleaning, carry out high-temperature and high-pressure disinfection again, and then store it in a dry and sterile storage box to prevent the tools from getting damp or colliding, which may cause wear to the hexagonal head.